이 글에서는 SSE 알림 기능 개발 과정에 대해서 다루겠습니다.
글의 목차는 다음과 같습니다.
1) 프로젝트에 알림 기능을 개발한 이유
2) SSE vs 웹소켓
3) SSE 알림 개발하기
4) Redis로 SSE 알림 캐싱하기
1) 프로젝트에 알림 기능을 개발한 이유
- 제가 개발하는 interviewPrep 프로젝트에는 인터뷰 문제에 대한 답안 작성 시, 다른 사람이 답안을 볼 수 있도록
하였습니다. 그리고 답안에 댓글을 남기는 기능도 개발했습니다.
이 때, 답안의 원 작성자는 자신의 답안에 다른 사용자가 댓글을 남기면 알림을 받고 확인할 수 있는 기능이
필요했습니다. 따라서 답안에 댓글이 추가되면 알림이 발송되는 기능을 추가했습니다.
2) SSE vs 웹소켓
- 알림 기능을 도입하는데 두 가지 옵션을 두고 고민했습니다. 첫째는, SSE, 두번째는 웹소켓입니다.
(1) SSE

- SSE는 서버와 한 번 연결을 맺고, 일정 시간 동안 서버에서 변경이 발생할 때마다 데이터를 전송 받는 방법입니다.
여기서 가장 중요한 특징은 SSE는 서버->클라이언트의 단방향 통신을 지원한다는 것입니다.
그리고 프로토콜은 별도의 프로토콜 없이 HTTP 프로토콜 위에서 동작한다는 특징을 갖고 있습니다.
(2) 웹소켓
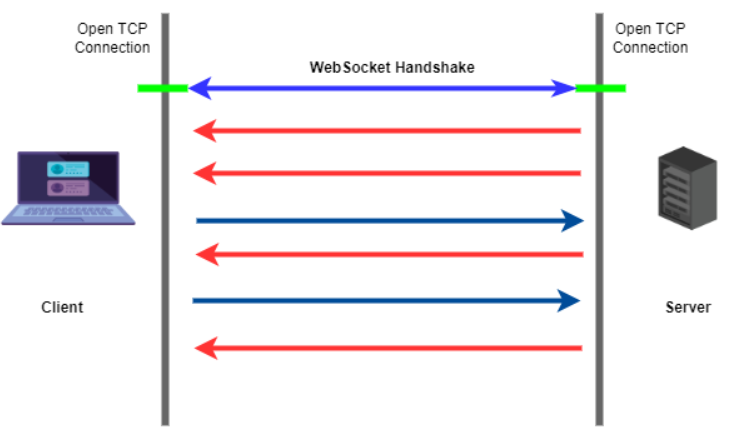
- 웹소켓은 SSE와는 다르게 양방향 통신을 지원합니다. 즉, 클라이언트->서버, 서버->클라이언트 통신이 가능합니다.
또한, 웹소켓은 별도의 프로토콜인 웹소켓 프로토콜 위에서 동작한다는 특징을 갖고 있습니다.
- SSE와 웹소켓의 전반적인 특징을 하나의 표로 정리하면 다음과 같습니다.
| SSE | 웹소켓 | |
| 통신 방향 | 단방향(서버->클라이언트) | 양방향 |
| 프로토콜 | HTTP | Websocket |
| 데이터 형태 | UTF-8 | UTF-8, Binary |
| 최대 동시 접속 수 | HTTP 기준 6개, HTTP2 기준 100개 | 브라우저 연결 한도가 없지만 서버 셋업에 따라 다름 |
| 리얼타임 | Yes | Yes |
| Firewall 친화적 | Yes | No |
- 결론적으로 저는 SSE를 선택했습니다.
그 이유는
(1) 실시간 알림은 서버->클라이언트로만 발송되기 때문에 단방향 통신으로 충분합니다.
(2) SSE는 HTTP 프로토콜위에서 동작하므로, Websocket에 비해 설정이 간단합니다.
3) SSE 알림 개발하기
(1) 서버 - 컨트롤러 구현
- 서버에서는 EventSource를 통해서 날아오는 요청을 수신할 컨트롤러가 필요합니다.
SSE 통신을 위해서는 MIME 타입을 text/event-stream으로 해줘야 합니다.
컨트롤러의 subscribe 메소드는 요청 수신 시 서비스의 subscribe 메소드를 호출하도록 하였습니다.
- 클라이언트에서 서버로 요청을 하는 시점은, 클라이언트에서 사용자가 로그인을 한 이후 시점으로 하였습니다.
@RestController
public class NotificationController {

    private final NotificationService notificationService;

    public NotificationController(NotificationService notificationService) {
        this.notificationService = notificationService;
    }

    /**
     * @title 로그인 한 유저 sse 연결
     */
    @GetMapping(value = "/subscribe", produces = "text/event-stream")
    public SseEmitter subscribe() {
        return notificationService.subscribe();
    }
}
(2) 서버 - 서비스 구현
@Service
public class NotificationService {
    private static final Logger log = LoggerFactory.getLogger(NotificationService.class);
    private static final Long DEFAULT_TIMEOUT = 60L * 1000 * 60;
    private final EmitterRepository emitterRepository;
    private final NotificationRepository notificationRepository;

    private final RedisDao redisDao;

    public NotificationService(EmitterRepository emitterRepository, NotificationRepository notificationRepository, RedisDao redisDao) {
        this.emitterRepository = emitterRepository;
        this.notificationRepository = notificationRepository;
        this.redisDao = redisDao;
    }


    public SseEmitter subscribe() {

        Long memberId = JwtUtil.getMemberId();
        String id = Long.toString(memberId);
        SseEmitter emitter = emitterRepository.save(id, new SseEmitter(DEFAULT_TIMEOUT));

        emitter.onCompletion(() -> emitterRepository.deleteById(id));
        emitter.onTimeout(() -> emitterRepository.deleteById(id));

        // 503 에러를 방지하기 위한 더미 이벤트 전송
        sendToClient(emitter, id, "EventStream Created. [memberId=" + memberId + "]");

        String SseId = "Sse"+ id;

        List<Notification> notifications = redisDao.getValuesForNotification(SseId);

        if(notifications == null){
            redisDao.setValuesForNotification(SseId);
            return emitter;
        }

        for(Notification notification: notifications) {
            sendToClient(emitter, id, notification);
            notification.read();
            notificationRepository.save(notification);
        }

        redisDao.deleteValuesForNotification(SseId);
        return emitter;
    }

    private void sendToClient(SseEmitter emitter, String id, Object data) {
        try {
            emitter.send(SseEmitter.event()
                    .id(id)
                    .name("sse")
                    .data(data));
        } catch (IOException exception) {
            emitterRepository.deleteById(id);
            log.error("SSE 연결 오류!", exception);
        }
    }


    @Transactional
    public void send(Member receiver, AnswerComment comment, String content) {
        Notification notification = createNotification(receiver, comment, content);
        String id = String.valueOf(receiver.getId());
        notification.createReceiverMemberId(id);
        notificationRepository.save(notification);

        // Emitter의 존재 여부를 확인하고,
        // Emitter 존재 시 notification 발송
        checkEmitterAndSendToClient(id, notification);

    }


    public void checkEmitterAndSendToClient(String id, Notification notification){

        Optional<SseEmitter> emitter = emitterRepository.findById(id);

        if(emitter.isPresent()){
            SseEmitter receiverEmitter = emitter.get();
            sendToClient(receiverEmitter, id, notification);
            notification.read();
            notificationRepository.save(notification);
            return;
        }

        String SseId = "Sse" + id;
        redisDao.updateValuesForNotification(SseId, notification);
    }


    private Notification createNotification(Member receiver, AnswerComment comment, String content) {
       return new Notification(receiver, comment, content, false);
    }

}
- 코드를 나눠서 살펴보겠습니다.
(2-1) subscribe 메소드
    public SseEmitter subscribe() {

        Long memberId = JwtUtil.getMemberId();
        String id = Long.toString(memberId);
        SseEmitter emitter = emitterRepository.save(id, new SseEmitter(DEFAULT_TIMEOUT));

        emitter.onCompletion(() -> emitterRepository.deleteById(id));
        emitter.onTimeout(() -> emitterRepository.deleteById(id));

        // 503 에러를 방지하기 위한 더미 이벤트 전송
        sendToClient(emitter, id, "EventStream Created. [memberId=" + memberId + "]");

        String SseId = "Sse"+ id;

        List<Notification> notifications = redisDao.getValuesForNotification(SseId);

        if(notifications == null){
            redisDao.setValuesForNotification(SseId);
            return emitter;
        }

        for(Notification notification: notifications) {
            sendToClient(emitter, id, notification);
            notification.read();
            notificationRepository.save(notification);
        }

        redisDao.deleteValuesForNotification(SseId);
        return emitter;
    }
- 현재 로그인된 사용자의 ID를 JwtUtil.getMemberId()를 통해 memberId에 저장합니다.
그리고 memberId의 자료형을 Long으로 변환해서 id에 저장합니다.
로그인된 사용자는 각각 자신만의 SseEmitter를 갖는데, 이를 사용자의 id로 만들어줍니다.
또한, SseEmitter가 끝나거나 만료되는 경우, SseEmitter를 삭제하는 코드를 추가합니다.
- 연결 요청에 의해 SseEmitter가 생성되면, 더미 데이터를 보내줘야 합니다.
왜냐하면 Sse 연결이 이뤄지고 나서, 데이터 전송이 한 번도 없었다면,
유효 시간이 끝난 후, 503 에러(Service Unavailable)가 발생하기 때문입니다.
- 그 다음은 id로 SseId 변수를 생성한 후, 해당 SseId로 Redis를 검색합니다.
Redis를 검색하는 이유는 캐싱된 알림, 즉 Notification이 있는지 확인하기 위함입니다. .
- 이 때, 만약 notifications가 null이라면,
Redis에 해당 SseId가 등록된 적이 없다는 의미이므로, Redis에 SseId를 key로 새로 key-value 셋을 등록합니다.
캐싱된 알림이 있다면, 일괄적으로 SseEmitter를 통해 전달되고, Redis에서 해당 알림들은 삭제됩니다.
그리고 최종적으로 해당 알림이 발송되었음을 DB에 업데이트합니다.
(2-2) sendToClient 메소드
private void sendToClient(SseEmitter emitter, String id, Object data) {
        try {
            emitter.send(SseEmitter.event()
                    .id(id)
                    .name("sse")
                    .data(data));
        } catch (IOException exception) {
            emitterRepository.deleteById(id);
            log.error("SSE 연결 오류!", exception);
        }
 }
- sendToClient 메소드는 emitter로 직접 클라이언트에 데이터를 보내기 위한 메소드입니다.
emitter로 데이터를 보내는 과정에 예외가 발생할 수 있으므로, try~catch문으로 처리하고,
예외 발생 시 해당 emitter는 바로 삭제되도록 하였습니다.
이러한 경우 Sse가 자동 재접속을 통해 클라이언트로부터 서버에 새로 Sse 연결을 시도하게 됩니다.
(2-3) send 메소드
    @Transactional
    public void send(Member receiver, AnswerComment comment, String content) {
        Notification notification = createNotification(receiver, comment, content);
        String id = String.valueOf(receiver.getId());
        notification.createReceiverMemberId(id);
        notificationRepository.save(notification);

        // Emitter의 존재 여부를 확인하고,
        // Emitter 존재 시 notification 발송
        checkEmitterAndSendToClient(id, notification);

    }
- send 메소드는 댓글이 작성되는 시점에 CommentService 클래스에서 호출되는 메소드입니다.
다음은 CommentService 클래스의 createComment 메소드이고,
생성된 comment를 DB에 저장한 후에, send 메소드가 실행되는 것을 확인할 수 있습니다.
    public CreateDto createComment(CommentReq commentReq){

        Long memberId = JwtUtil.getMemberId();

        Member member = findMember(memberId);
        Answer answer = findAnswer(commentReq.getAnswerId());
        Member answerWriter = answer.getMember();

        answer.commentIncrease();
        answerRepository.save(answer);

        AnswerComment comment = AnswerComment.builder()
                .answer(answer)
                .answerWriter(answerWriter)
                .member(member)
                .comment(commentReq.getComment())
                .build();

        AnswerComment savedComment = commentRepository.save(comment);
        notificationService.send(answerWriter, savedComment, "새로운 댓글이 추가되었습니다!");

        return CreateDto.builder()
                .id(comment.getId())
                .createDate(customLocalDateTime(comment.getCreatedDate()))
                .name(comment.getMember().getName())
                .build();
    }
- send 메소드에서는 전달받은 comment로 notification 객체를 만듭니다.
그리고 해당 notification을 DB에 저장한 후에, checkEmitterAndSendToClient 메소드를 호출합니다.
(2-4) checkEmitterAndSendToClient 메소드
    public void checkEmitterAndSendToClient(String id, Notification notification){

        Optional<SseEmitter> emitter = emitterRepository.findById(id);

        if(emitter.isPresent()){
            SseEmitter receiverEmitter = emitter.get();
            sendToClient(receiverEmitter, id, notification);
            notification.read();
            notificationRepository.save(notification);
            return;
        }

        String SseId = "Sse" + id;
        redisDao.updateValuesForNotification(SseId, notification);
    }
- checkEmitterAndSendToClient 메소드는 emitter가 있는지,
즉, 해당 알림을 받아야 하는 사용자가 로그인된 상태인지 확인하고,
emitter가 있다면, 바로 알림 수신 대상인 사용자에게 알림을 발송하고,
emitter가 없다면, 해당 알림을 Redis에 캐싱하는 기능을 하는 메소드입니다.
4) Redis로 SSE 알림 캐싱하기
- 사용자가 로그인되지 않은 상태에서 받는 알림들은
Redis를 캐싱 서버로 활용해서 캐싱되도록 하였습니다.
- 이 때, key는 Sse+사용자 ID로 value들은 발송되어야 할 알림들이 저장되도록 하였습니다.
(1) RedisDao 클래스
- RedisDao 클래스에서 Redis 캐싱 서버에 대한 CRUD를 구현하였습니다.
@Component
public class RedisDao {
    private RedisTemplate<String, String> redisTemplate;
    private RedisTemplate<String, List<Notification>> redisTemplateForNotification;
    public RedisDao(RedisTemplate<String, String> redisTemplate, RedisTemplate<String, List<Notification>> redisTemplateForNotification) {
        this.redisTemplate = redisTemplate;
        this.redisTemplateForNotification = redisTemplateForNotification;
    }

    public void setValues(String key, String data) {
        ValueOperations<String, String> values = redisTemplate.opsForValue();
        values.set(key, data);
    }

    public void setValues(String key, String data, Duration duration) {
        ValueOperations<String, String> values = redisTemplate.opsForValue();
        values.set(key, data, duration);
    }

    public String getValues(String key) {
        ValueOperations<String, String> values = redisTemplate.opsForValue();
        return values.get(key);
    }


    public void deleteValues(String key) {
        redisTemplate.delete(key);
    }

    public void setValuesForNotification(String key) {
        ValueOperations<String, List<Notification>> values = redisTemplateForNotification.opsForValue();
        List<Notification> emptyList = new ArrayList<>();
        values.set(key, emptyList);
    }

    public List<Notification> getValuesForNotification(String key) {
        ValueOperations<String, List<Notification>> values = redisTemplateForNotification.opsForValue();
        return values.get(key);
    }

    public void updateValuesForNotification(String key, Notification notification) {
        ValueOperations<String, List<Notification>> values = redisTemplateForNotification.opsForValue();
        Object value = values.get(key);
        ObjectMapper objectMapper = new ObjectMapper();
        List<Notification> notifications = objectMapper.convertValue(value, new TypeReference<List<Notification>>() {});
        notifications.add(notification);
        values.set(key, notifications);
    }

    public void deleteValuesForNotification(String key) {
        ValueOperations<String, List<Notification>> values = redisTemplateForNotification.opsForValue();
        Object value = values.get(key);
        ObjectMapper objectMapper = new ObjectMapper();
        List<Notification> notifications = objectMapper.convertValue(value, new TypeReference<List<Notification>>() {});
        notifications.clear();
        values.set(key, notifications);
    }
}
(2) RedisConfig 클래스
- RedisConfig 클래스에서는 Redis 클라이언트를 지정해야 합니다.
Redis 클라이언트에는 대표적으로 Lettuce, Jedis가 존재하는데,
이 중에 Lettuce가 성능적으로 우수하므로 Redis 클라이언트로 지정하였습니다.
(참고: Jedis 보다 Lettuce 를 쓰자 (tistory.com))
@Configuration
public class RedisConfig {

    @Value("${spring.redis.host}")
    private String host;

    @Value("${spring.redis.port}")
    private int port;

    @Bean
    public RedisConnectionFactory redisConnectionFactory() {
        return new LettuceConnectionFactory(host, port);
    }

    @Bean
    public RedisTemplate<String, String> redisTemplate() {
        RedisTemplate<String, String> redisTemplate = new RedisTemplate<>();
        redisTemplate.setKeySerializer(new StringRedisSerializer());
        redisTemplate.setValueSerializer(new StringRedisSerializer());
        redisTemplate.setConnectionFactory(redisConnectionFactory());
        return redisTemplate;
    }

    @Bean
    public RedisTemplate<String, List<Notification>> redisTemplateForNotification() {
        RedisTemplate<String, List<Notification>> redisTemplate = new RedisTemplate<>();
        redisTemplate.setKeySerializer(new StringRedisSerializer());
        GenericJackson2JsonRedisSerializer listSerializer = new GenericJackson2JsonRedisSerializer();;
        redisTemplate.setValueSerializer(listSerializer);
        redisTemplate.setConnectionFactory(redisConnectionFactory());
        return redisTemplate;
    }
}
-참고 자료
Server-sent events vs. WebSockets - LogRocket Blog
WebSockets vs Server-Sent Events: Key differences and which to use (ably.com)
웹소켓 과 SSE(Server-Sent-Event) 차이점 알아보고 사용해보기 — 개발자로 살아남기-캐나다 (tistory.com)
[Spring + SSE] Server-Sent Events를 이용한 실시간 알림 (velog.io)
'interviewPrep 프로젝트' 카테고리의 다른 글
| 로그인 시 JWT Access Token, Refresh Token 적용하기(with Redis) - 1부 (0) | 2023.09.12 |
|---|---|
| Mysql Named Lock으로 좋아요 기능에 대한 동시성 처리하기 (0) | 2023.09.11 |
| Spring에서 Mysql Replication으로 Master/Slave 이중화하기 (0) | 2023.09.09 |
| Spring Security를 활용한 Oauth2 적용 (0) | 2022.11.02 |
| JUnit과 Mockito로 고립된 단위 테스트 작성 (0) | 2022.10.31 |


